


***This post originally appeared on abitofgeek.blogspot.com back in September 2012***
Since falling inexplicably deep into the Doctor Who fandom I have decided that I need to be surrounded by all things Doctor Who. Thus far I have some socks and the tenth Doctor's screwdriver, but I need more. MORE! The BBC website has offerings that are drool worthy, but for the Whovian on a budget I have a solution: a homemade TARDIS desk lamp!
 Bow to the TARDIS, for it gives light and is good.
I tend to be willy nilly with my projects, which means that I don't have plans or a pattern to show you. If/when I choose to build another one it'll have to be from scratch and experience. I can tell you all what I used though, and give as much advice as possible. So hold onto your hats while I present: how to build a TARDIS!This is going to be a little long, but please bear with me! Or at least just scroll through and look at the pictures :D
 Overview of materials used!
More specific breakdown of smaller items.
 All the paint you'll need.
 It didn't seem like so many materials as I was making it. Also, the lamp piece
is a "candelabra" size. This is important! Get the matching light bulbs.
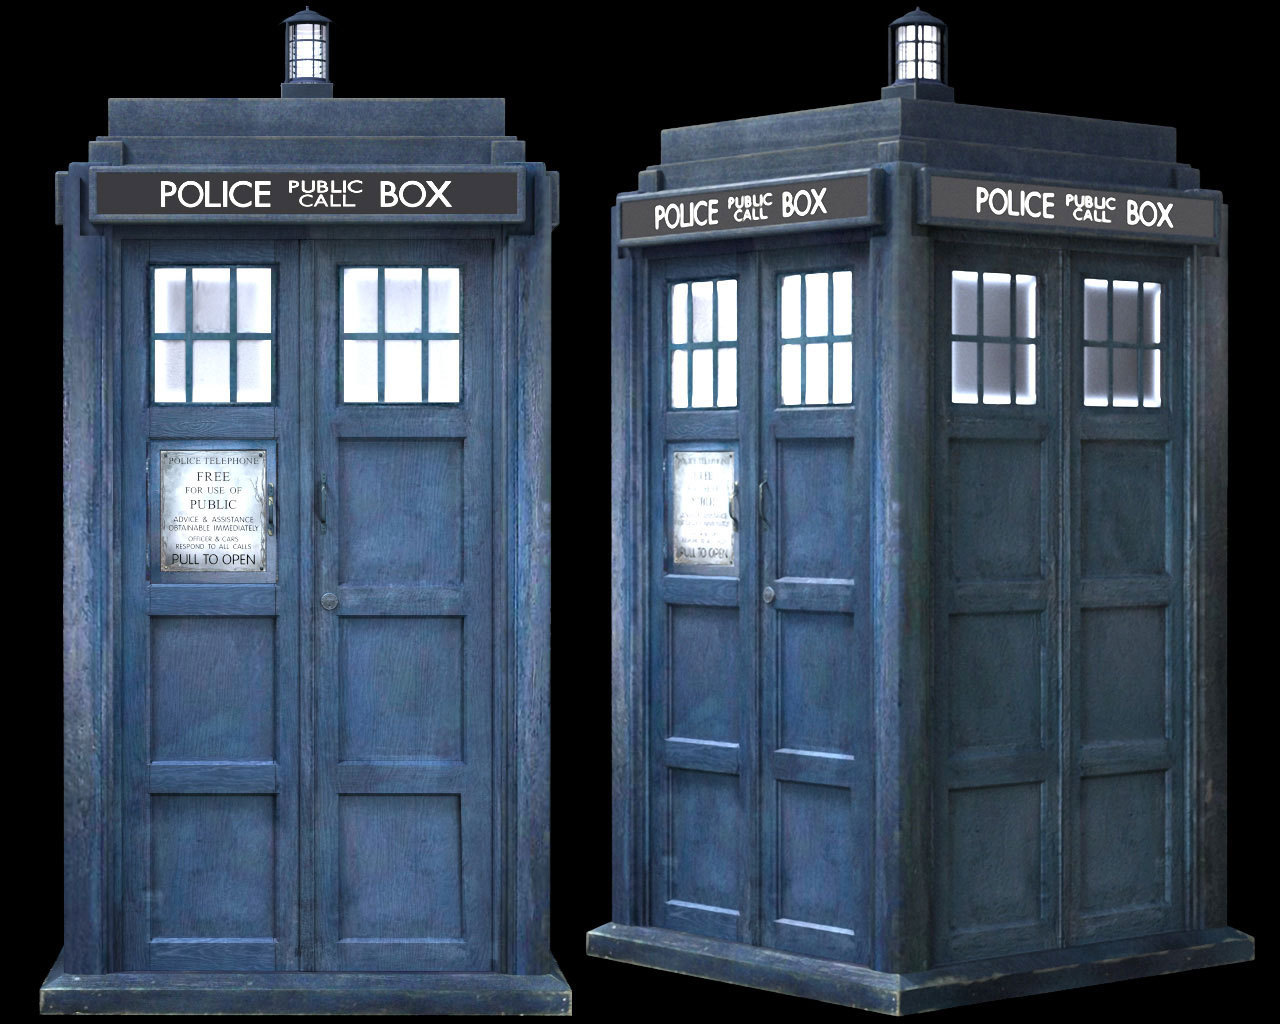
I had all of the supplies I needed at my house already as a result of working on a variety of craft projects in the past. The only thing I needed to go out and buy was the lamp pieces. It's important to note that the variety of glues DID come in handy. Rubber cement was great for working with the transparency paper, while the white craft glue was for assembling the foam core pieces. Super glue was necessary for the lamp piece on the top of the TARDIS, and a hot glue gun (not pictured) was invaluable when it came down to pieces of foam core that wouldn't cooperate.Let's get started!First you want to figure out the dimensions of your finished TARDIS. My main panels measured 15cm by 23cm (working in centimeters was much simpler than inches), with the top parts getting gradually smaller (I eyeballed it based on this image) and the base measuring 21cm by 21cm squared, and 3 1/2 cm high. This extra 3 1/2 cm on the base accounted for the cord space needed from the lamp piece.


Once you have your dimensions you can then start drawing in where your 'Police Public Call Box' sign will go, then where your eight windows will go. Be sure to account for the layered side pieces that give the box its extra dimensions and detail. Cutting puzzle notches in the base piece as well as the four sides of your TARDIS will allow you to easily take the TARDIS off of the base piece to access the light bulb once it's fully assembled.

That third image there should say "CUT A HUGE SQUARE OUT OF IT, or else how on EARTH will the light shine through the lantern on top?!" And, as a note, the raised area in the first image was achieved by cutting the paper layer off of the foam core. It's a slow process, but not impossible.

For the top portion I glued the shorter outer square first, then glued the taller inner square to it (image one). I don't know if it would have been easier to do it the other way around or not! This wasn't so much guesswork as it was measuring and assessing my master image to try and create similar proportions.

It may be worth noting that, at this point, the ONLY PIECES that I had glued together were the top pieces. Those three square pieces are one unit (image three), but they are NOT yet glued to the TARDIS as a whole. You need to have easy access to the underside of the top area in order to install your lantern. Depending on how you paint, your TARDIS will probably need a second coat.

Useful tip (maybe): I painted on the rough side of the transparency paper. This allowed me to wet a paper towel and remove finger prints and smudges from the smooth side once I was done handling the transparency, and before I glued it to the panels. The 0.20mm black micron pen comes in very handy for that Free For Use Of Public sign! I recommend practicing a few times, and only gluing the paper onto the transparency once you're completely satisfied.Useful tip #2: make sure you add your window bars to the top windows BEFORE you glue the transparency sheets onto the foam core panels. I had to add mine after the fact and it was really difficult and they didn't turn out how I wanted.

Make sure you glue support beams into the inside of the TARDIS before adding your lid piece, or else what will the lid piece sit on? It'd just fall to the bottom of the unit, and that's completely counter productive.Also, a little note on affixing the metal legs to the lantern top: white glue didn't work, and neither did rubber cement. I had to use a combination of glue and newspaper to create a "seal" over the bent piece of metal. As you can see, I set the lantern lid and its four bent pieces of metal to dry overnight on my white glue bottle. I'm happy to say that it worked! The next morning the newspaper had dried and successfully kept the bent pieces of metal in place. I'd love to find a sturdier solution, though.

My best answer for the glass lantern was to take a strip of transparency paper, make a tube, glue it together with super glue (and nearly glue my fingers together in the process) and then coat the whole thing in a layer of rubber cement. The purpose of the rubber cement was to kind of hide the super glue marks. I like to tell myself that it gives the thing an old, sagging glass aesthetic. ...

For the signs, I really should have lined them up OVER the "door" panels before I wrote on them. If you look at the TARDIS in pictures, you can see that "Public Call" are lined up perfectly over the center of the two panels. Mine are a little bit off.

Once I had my lamp parts in hand, I realized that I'd need to add risers to my lower base in order to make room for the lamp cord. When I went to add these pieces, I found that my lower base piece had warped quite a bit during the painting process. Bummer. I had enough foam core left over though, so I just made a new one, careful to not get it too wet.

Once your raised base is painted, dried, and has a hole in the center to accommodate the lightbulb end of your lamp piece, MAKE SURE THERE'S AN IDENTICAL HOLE IN YOUR PUZZLE PIECE BASE FOR THE ACTUAL TARDIS. Apologizes for the caps, I don't mean to yell, but it'd be kind of difficult to cut this hole after you've already glued the two pieces together.Make sure the holes are just a hair too small, that way the lightbulb end of your lamp piece will fit snugly. Screw in a lightbulb, gently push your fully assembled TARDIS onto the puzzle piece bottom, and you're DONE!
 Lights off.
 Lights on!
 TA-DA! TAR-DIS! See what I did there?
And there you have it! This took me around twenty hours or so and I had a lot of fun building it. My paints were acrylic, so any stray blotches were cleaned up easily with water. The most dangerous part was working with the super glue, and your friendly Home Depot associate will help you pick out the perfect light bulbs. You know, the ones that won't get really hot inside of the TARDIS and set everything on fire.
I hope that this was entertaining, informative, or useful, or even all of the above! I tried to take as many photos and notes as possible, but it would have been most beneficial if I had made a master copy of my plans that could be uploaded to you nice people out on the internet. I'd love to build this again out of wood, and someday full size, and when that happens I'll do my best to make blueprints!
Have you made any wonderful Doctor Who items? Please show them to me!! If you are interested in building your own TARDIS lamp and you have questions, then please please ask!
-MJ
*all photos property of Miranda Eubanks/abitofgeek
*TARDIS/Doctor Who rights belong to BBC, I assume.


